
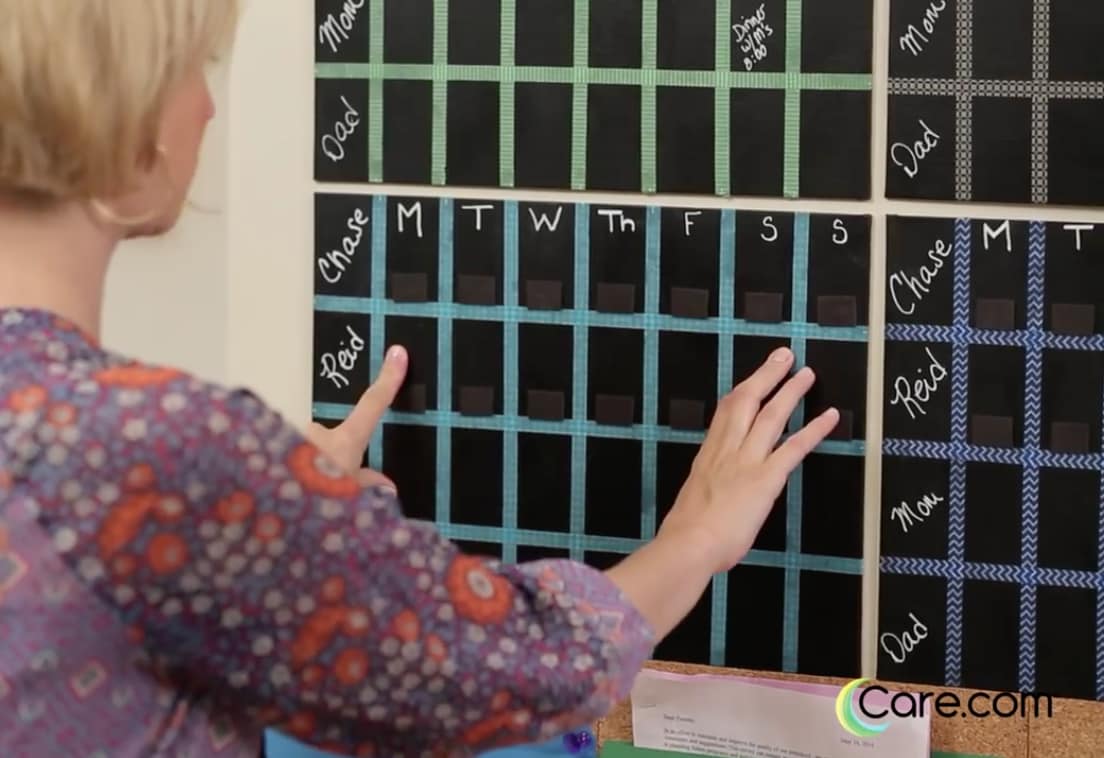
This DIY calendar takes the term “family planning” to a different level! Check out this step-by-step tutorial for a making a family calendar that will keep everyone on track and separate each person’s tasks and activities for best visibility.
Dad is traveling Monday to Wednesday. Mom has a work dinner on Tuesday. Kids have soccer practice, music lessons and special play dates. Each day provides a new schedule for a child. From who will pick him up from school (you, a friend’s parent or an after-school sitter), to which activity she needs to pack gear for, to which chore he’s responsible for at home.
It’s also great to see birthday parties in advance (so buying gifts isn’t at the last minute), when each parent will be away or home late and which babysitter is coming for your Saturday date night.
We used magnets so we could move common tasks around easily. We also wanted an area where all important papers and notices could be found and viewed. The cork boards and folders at the bottom of the calendar allow families to post can’t-lose items like party invitations, concert tickets and lunch money, while also creating a space for important mail, papers or tests that need signatures.
Materials:
- 4 flat canvases
- Blackboard spray paint
- Craft tape
- Roll of adhesive back magnet tape
- White paper
- Mod Podge
- 3-4, 12×12 self-adhesive cork board tiles
- Chalk board pens (like these)
- Thumb tacks
- File folders (one for each child, and one for parents)
Directions:
Step 1:
Spray the canvases with three coats of chalkboard paint, letting them dry for 15-20 minutes between each coat.
Step 2:
Once the paint has dried, use the tape to create a grid. Each board will represent a week. And each person gets a row to themselves. We made ours eight boxes wide (every day of the week, plus the family member’s name) and four boxes long (number of family members).
Step 3:
Cut out strips of magnet tape and adhere one to each box on your grid.
Step 4:
Cut 1-inch squares of magnet and stick on 1-inch squares of white paper. (Trim for clean edges).
Tip: We printed icons out from the computer. But you can also draw or write chores, activities or reminders on each piece of magnet.
Then, cover the paper with a thin coat of Mod Podge. Let dry and then add one to two more coats for a firm plastic-coated-like finish.
Step 5:
Use temporary adhesive mounting tabs to stick your new calendars to the wall. Place your folders under or around to create a Family “Central Station” effect.


