
If your dogs luscious locks are getting out of control and they’re looking a bit haggard, it’s probably time for a grooming session. However going to the groomer’s and getting it done professionally can burn a sizable hole in your pocket. Learning how to groom a dog at home can solve your problem — and still help your dog look and feel their best.
How to Groom a Dog in 5 Easy Steps
- Give Them A Bath
Wash your dog thoroughly before you begin the grooming process to remove any excess dirt, oils and debris. Always use dog-friendly shampoos and products that do not contain harsh chemicals that could irritate your dog’s skin. Dry your dog completely with towels or a hair dryer.
- Detangle Their Matted Fur
Brush out your dog’s hair or fur using a detangling brush. Tangled and matted hair can prevent you from visualising the end result, so detangling the hair ahead of time helps you avoid this confusion. Trim off any large mats with scissors.
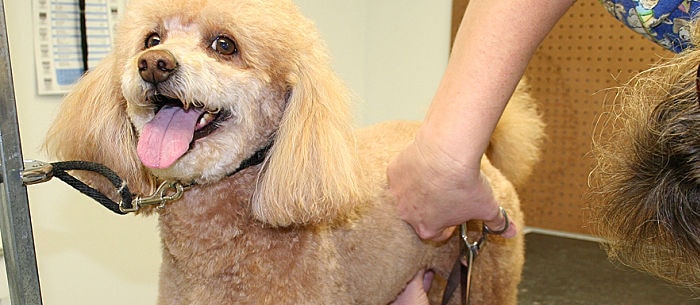
- Use Clippers
When learning how to groom a dog at home, use clippers over the majority of your dog’s coat to trim the hair evenly. Invest in high-quality clippers known to work well on dog fur. Purchase snap-on combs to attach to the clippers. These combs help give your dog a smooth, even finish and also prevent you from trimming the fur too short or accidentally cutting your dog’s skin.
When you start clipping, keep your opposite hand on the dog at all times. Pull the skin taut with your opposite hand while you run the clippers down your dog’s body. This will prevent skin folds from getting in the way and causing a lumpy appearance in the coat. As you work around the body, including the legs and underbelly, always keep the skin as tight and stretched as you can.
- Refine with Thinning Shears
After finishing with the clippers, use thinning shears to refine your dog’s look and trim around delicate areas like the eyes and feet. You could also use thinning shears around the face to avoid leaving lines and marks like scissors would. Instead of using scissors, thinning shears will leave a nice, soft trim.
When you do it with the scissors, it’s going to leave a sharper line. Thinning shears will give your dog a more natural look, and the design of the shears helps you avoid accidentally cutting your dog when you trim around those difficult areas like the nose, feet and eyes.
- Trim the Nails
One of the trickier parts of learning how to groom a dog is trimming their nails. Your dog needs regular nail trimming to prevent foot problems. If you feel intimidated by the idea of cutting your dog’s nails, never fear — you might just need the right tool and a little know how. Start by purchasing properly designed dog nail trimmers. Never use nail trimmers designed for humans, which can actually split and damage dog nails.
If you need more confidence when trimming your dog’s nails, ask your vet to teach you how to hold a dog while trimming and how to angle the nail clippers. Start by looking at the nails from the side. The quick lives underneath and is in the fat part of the nail.
If you clip the quick, your dog can bleed, so angle the nail clippers so they face away from this area. It’s also important to have someone hold the dog during nail trimming. The most important part of trimming nails is having a good holder. If you don’t have a good holder, it makes it stressful for everybody, and that’s why dogs are so reluctant to have their nails trimmed.
Still need help with dog grooming? Check out Care.com today.